Dino Mendez Gallery Hero — 2400x900

Real Patient Results: Before & After Transformations

Explore real before-and-after transformations showcasing Dr. Mendez’s meticulous technique and commitment to natural-looking results.

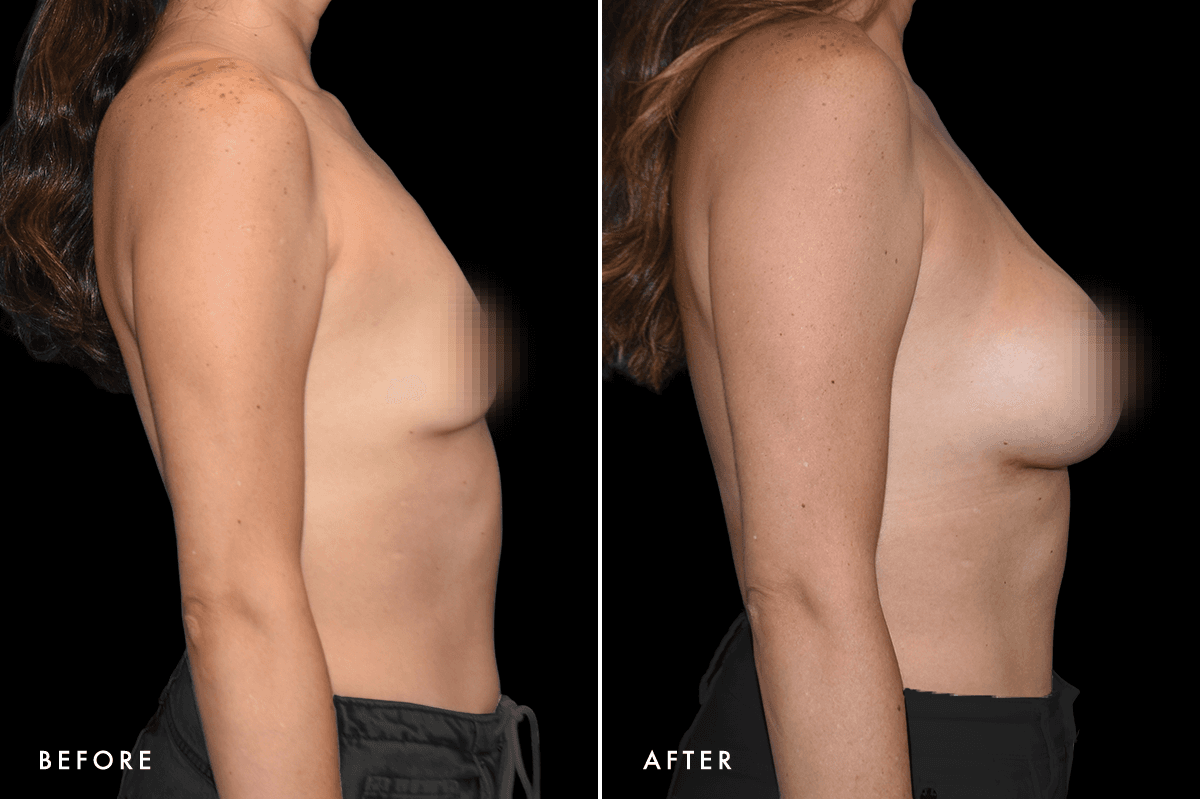
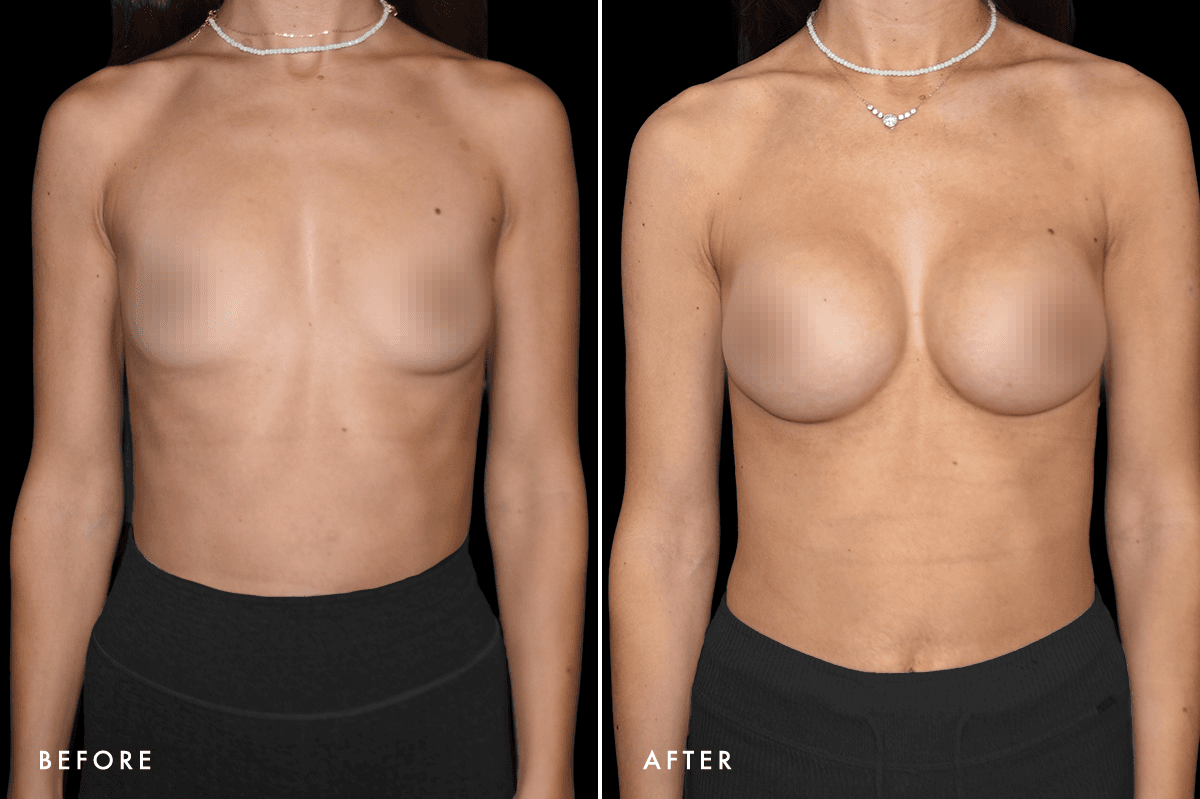
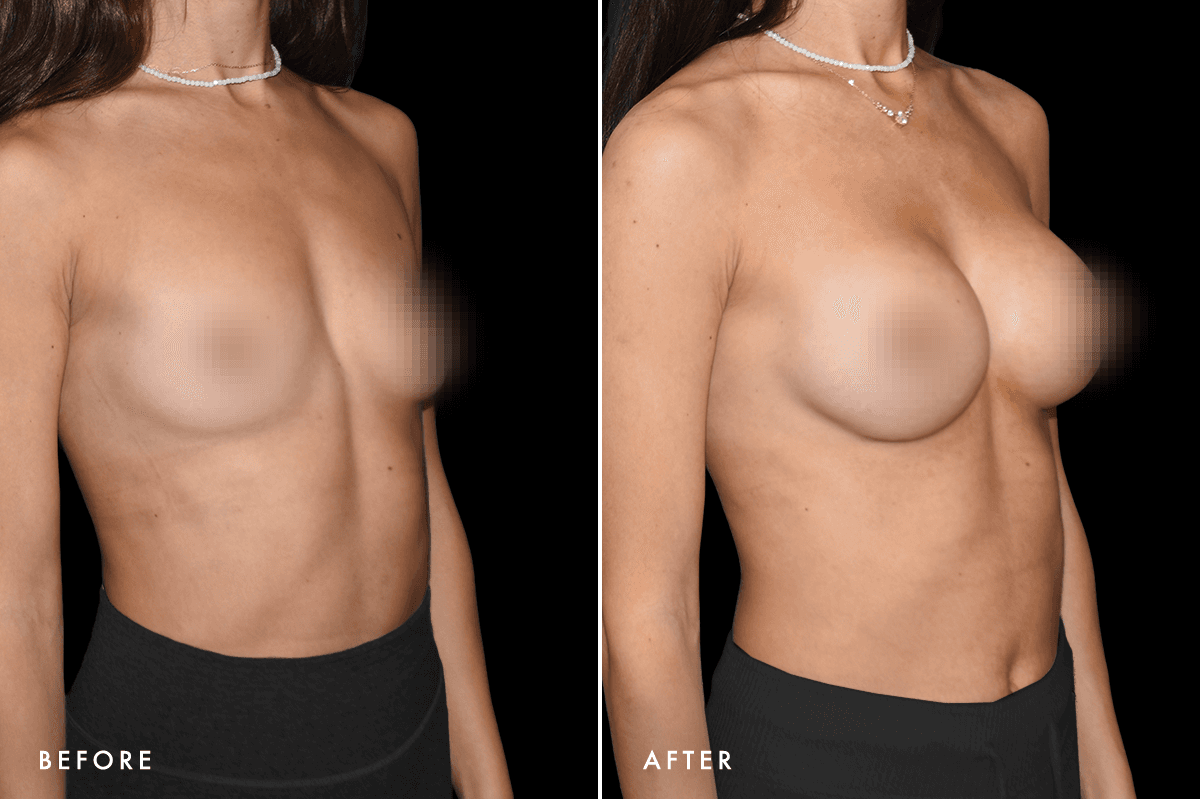
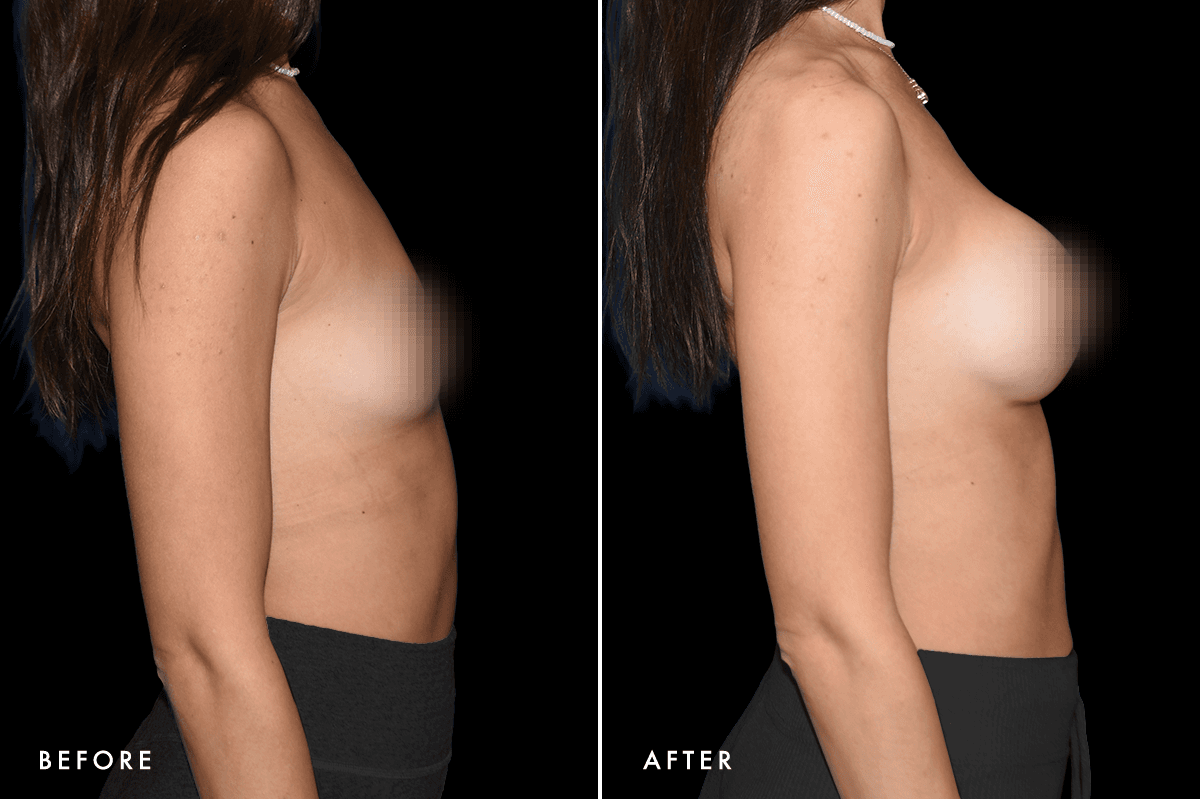
Breast Augmentation
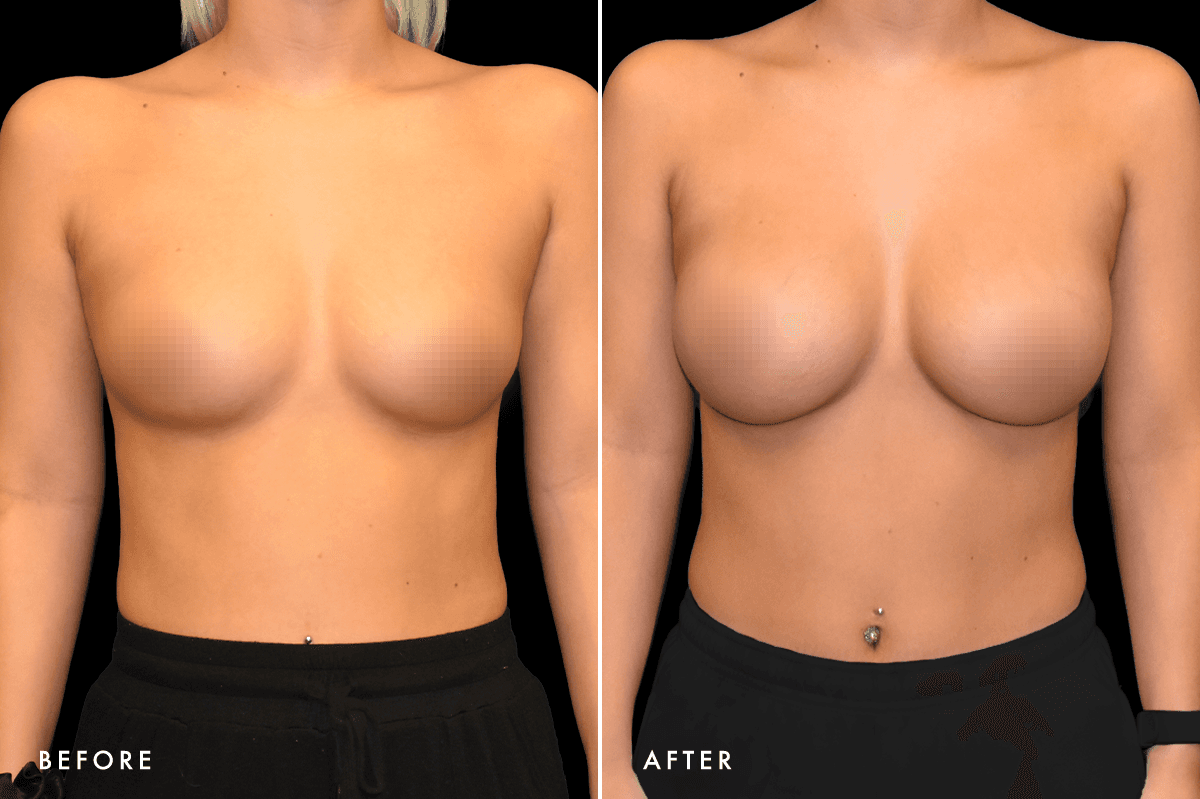
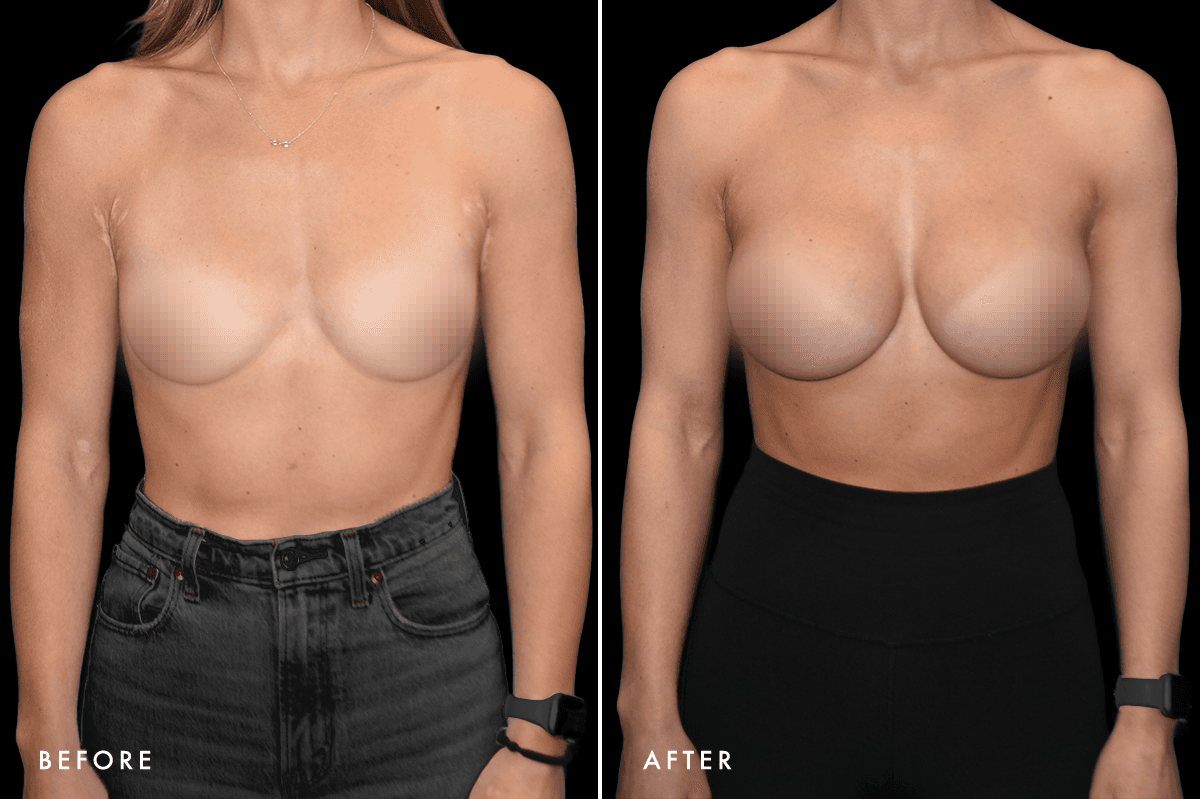
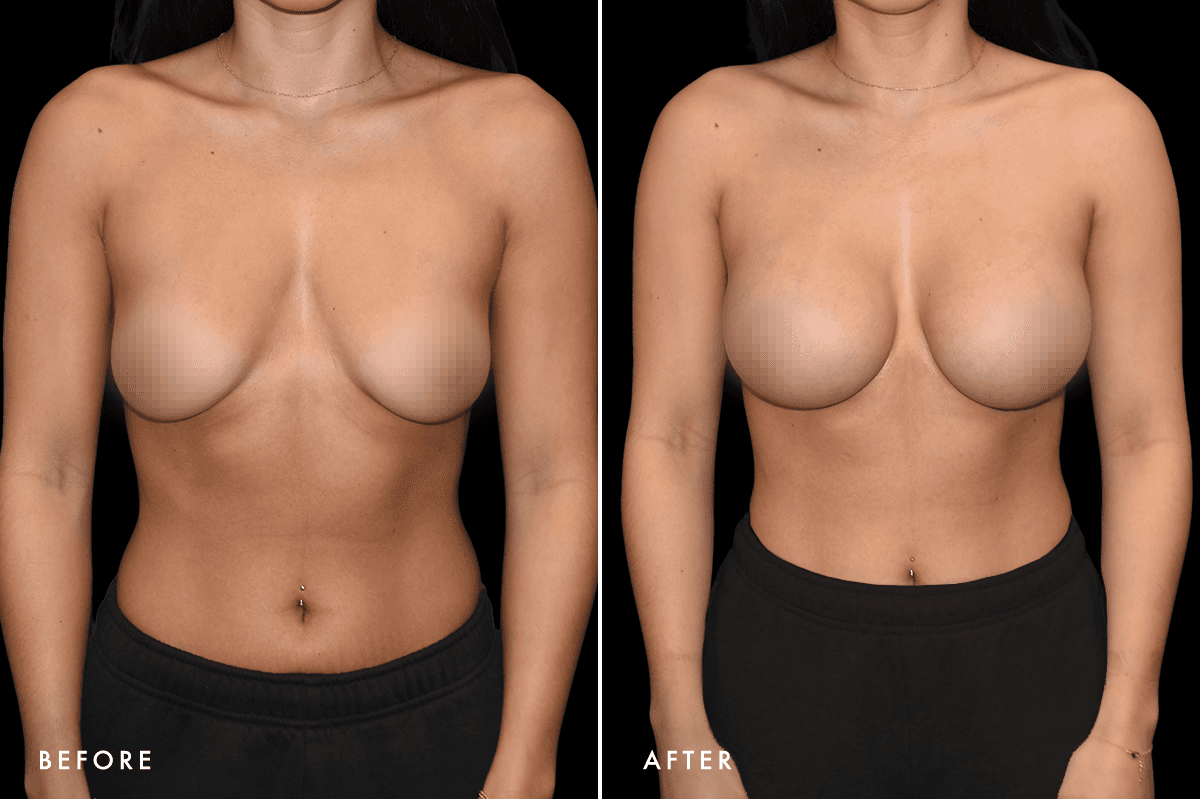
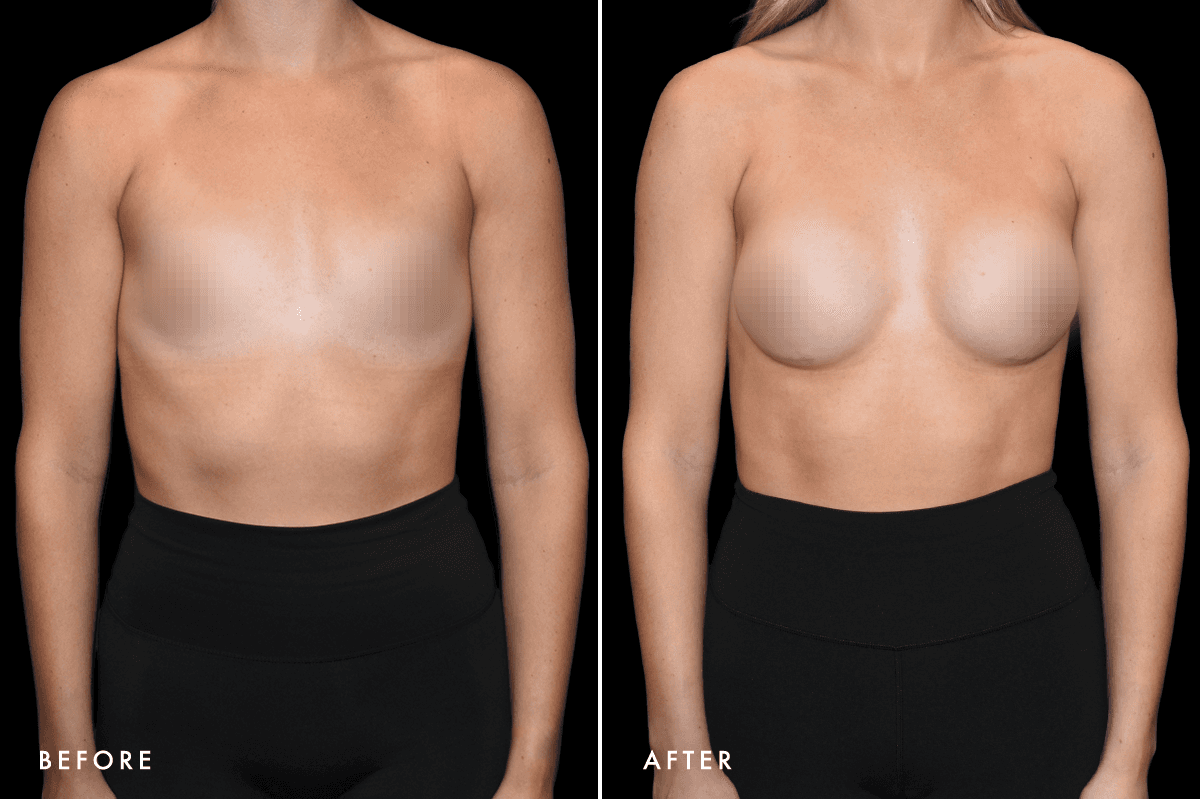
DM Breast Augmentation Gallery — Patient 1 Front

Patient 1

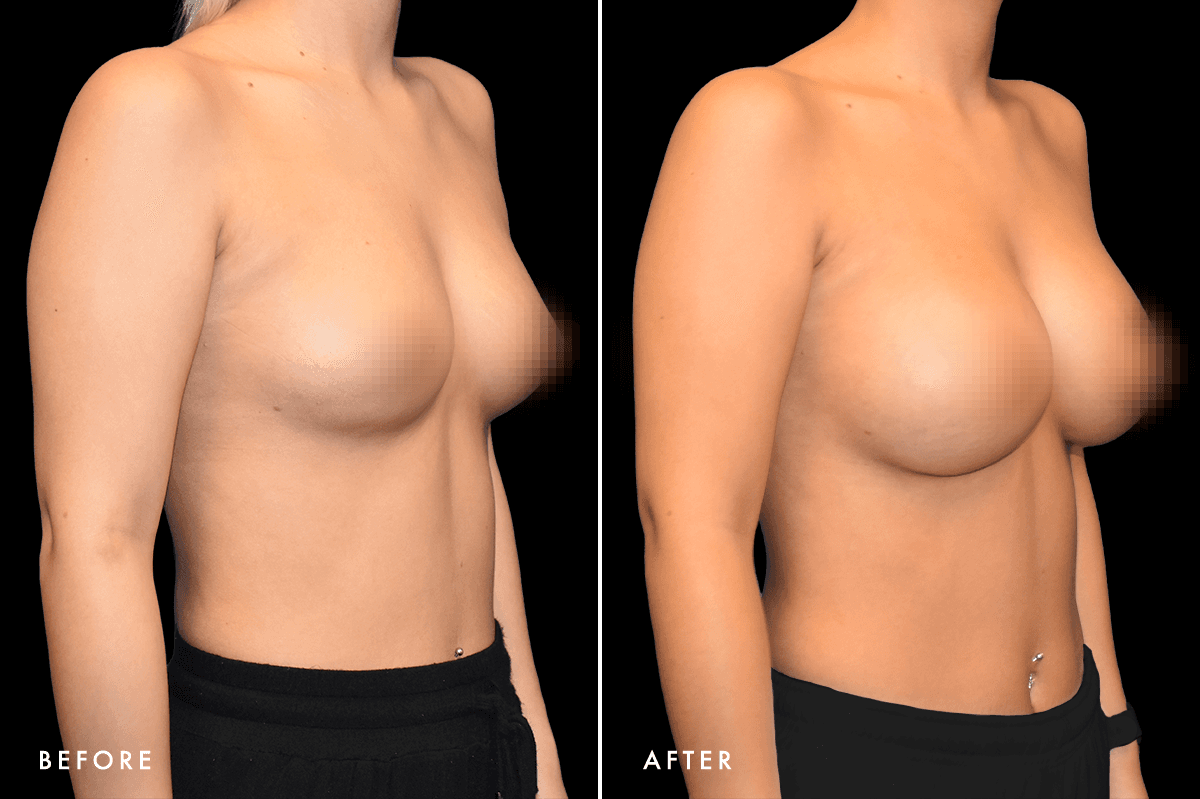
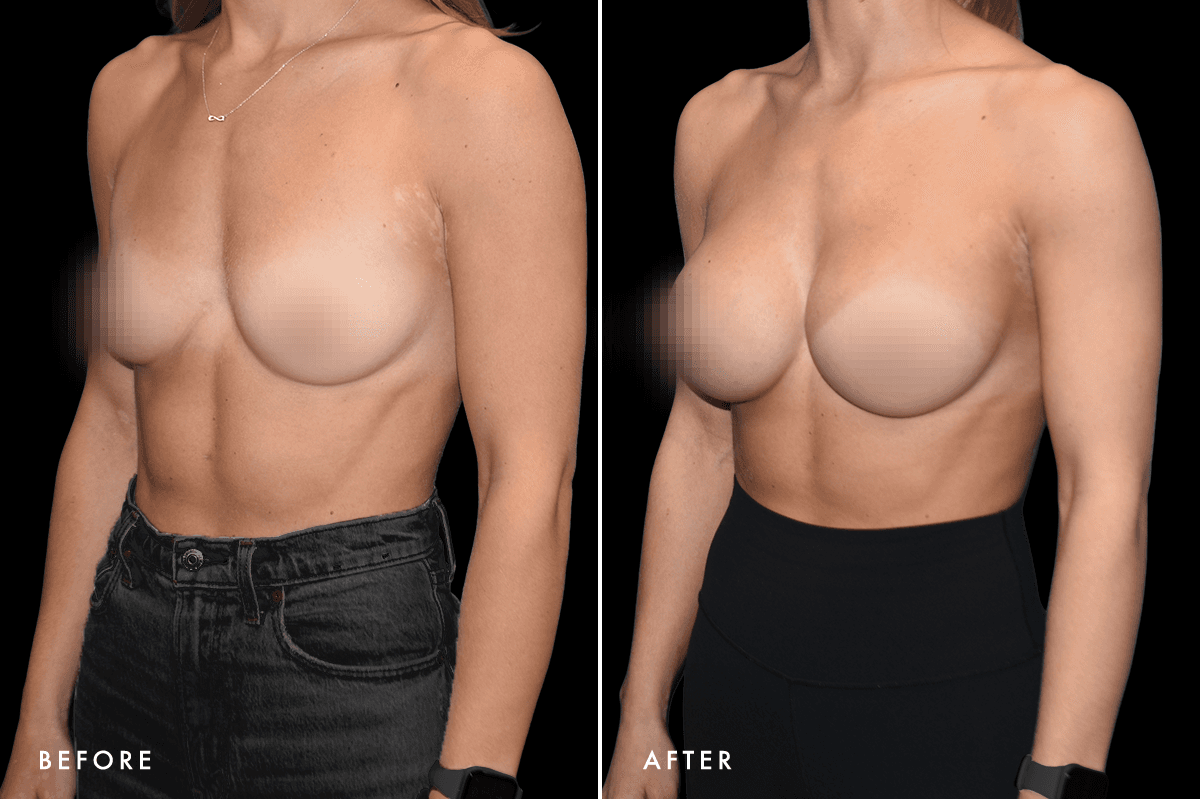
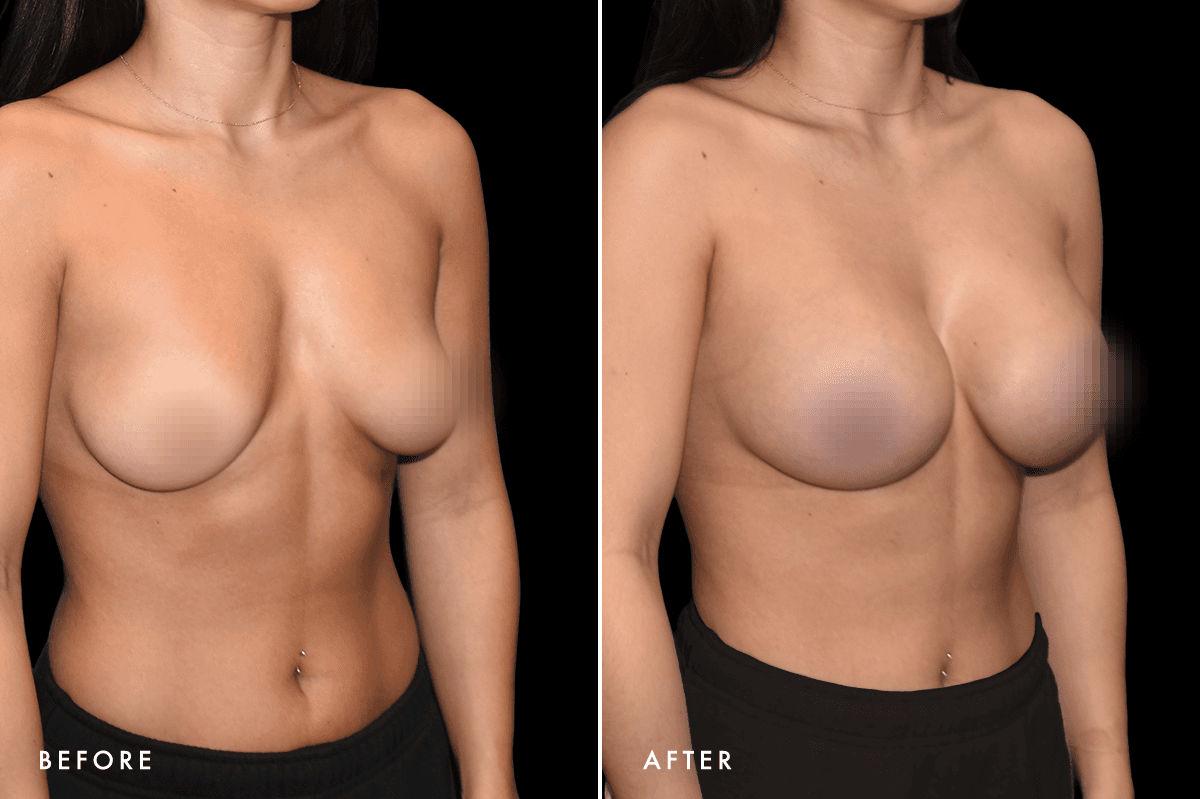
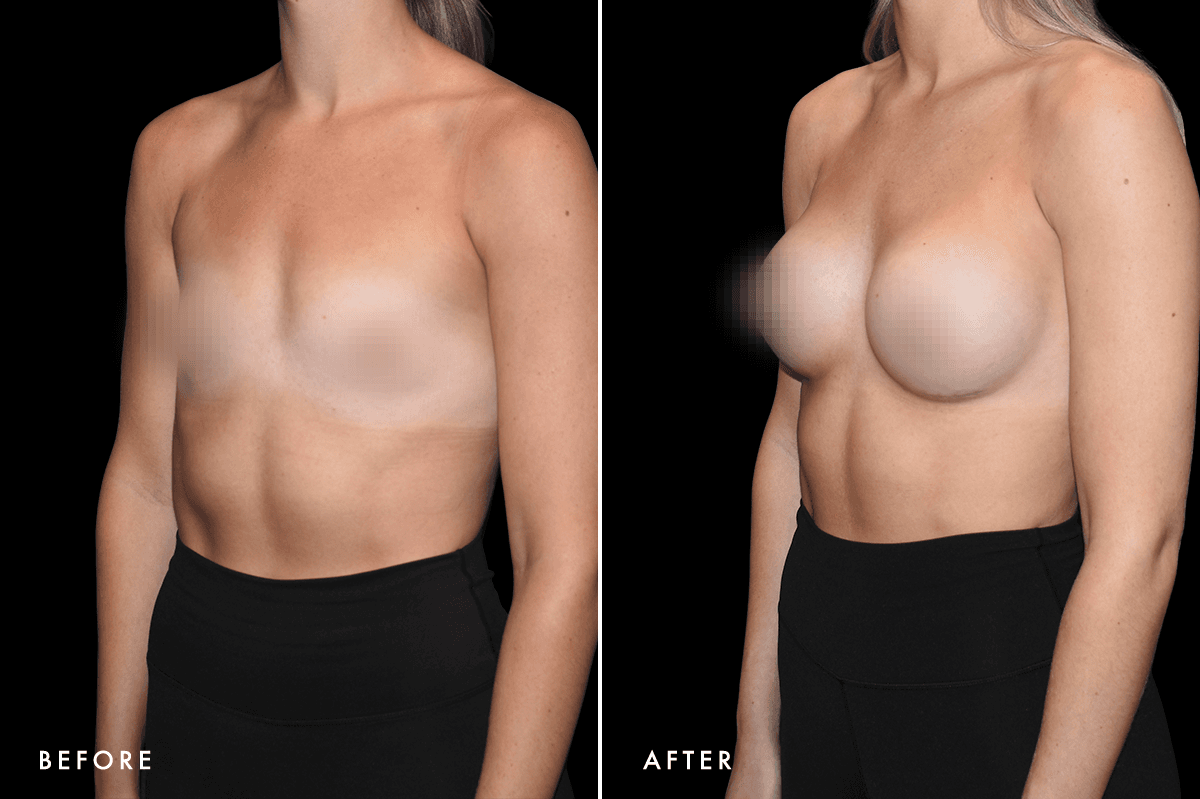
DM Breast Augmentation Gallery — Patient 1 Angle

Patient 1

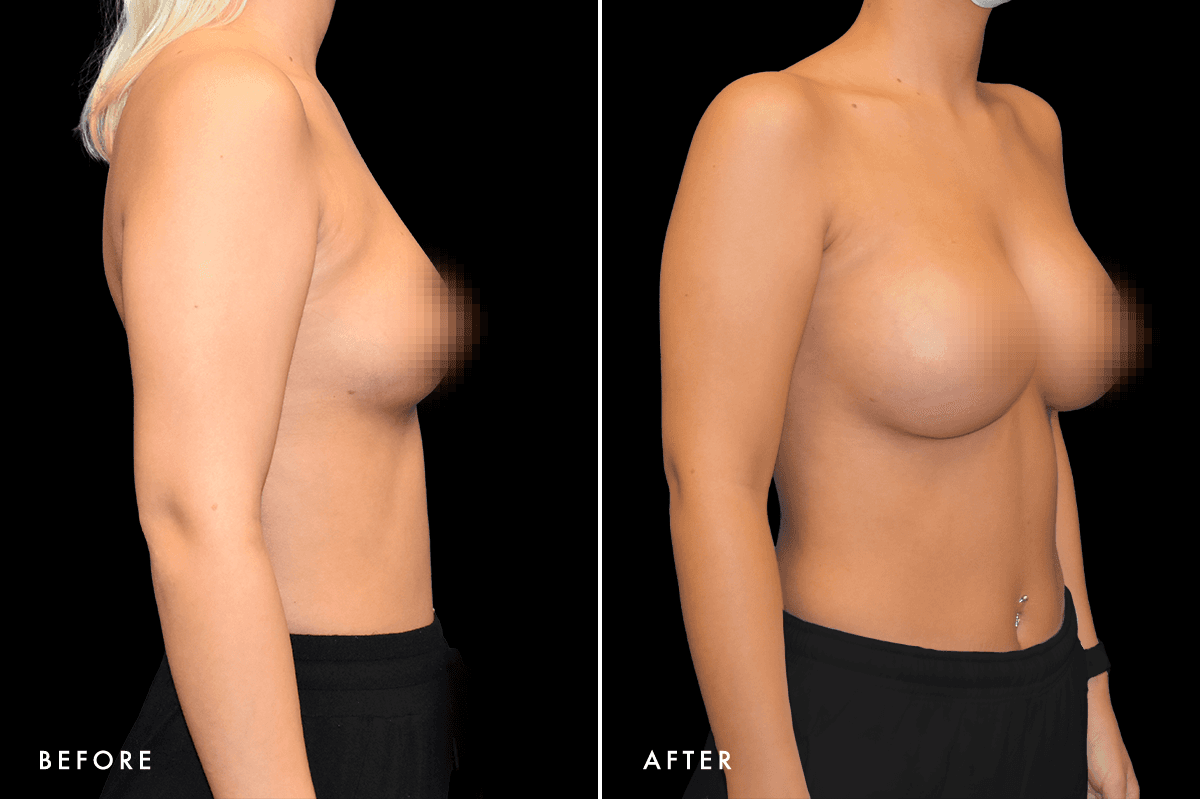
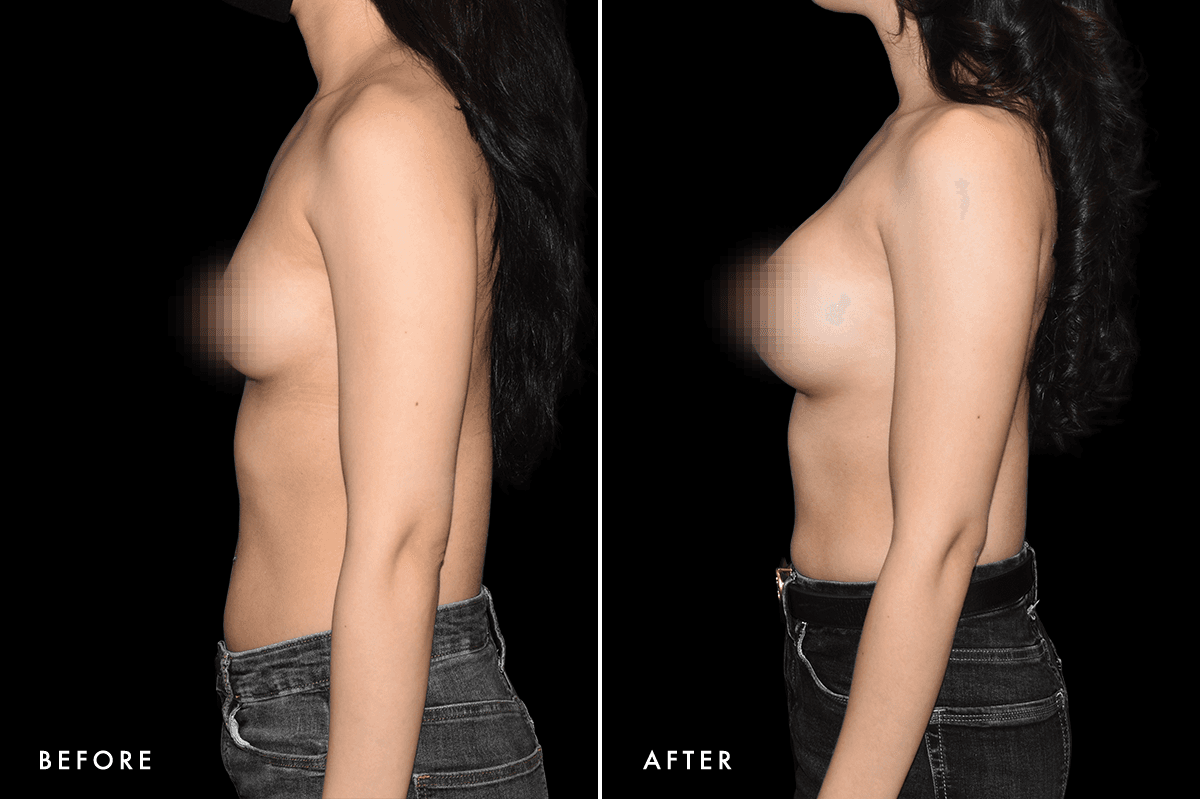
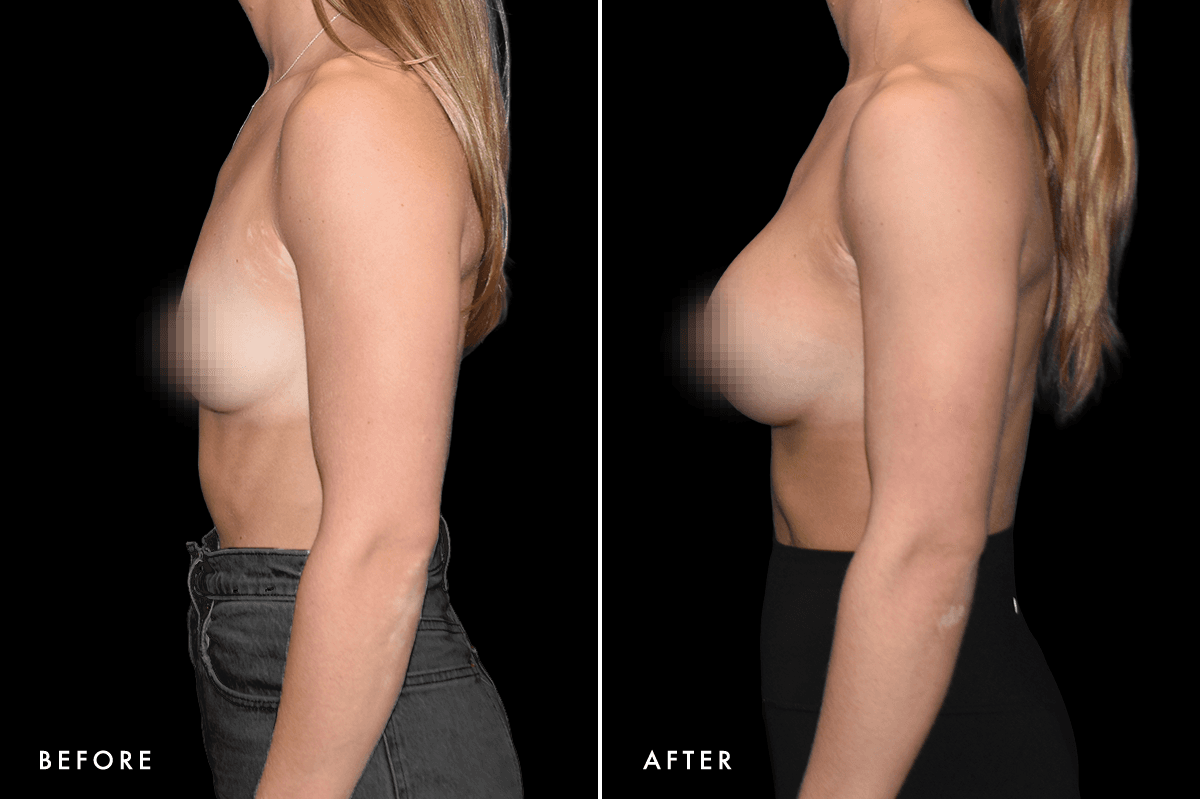
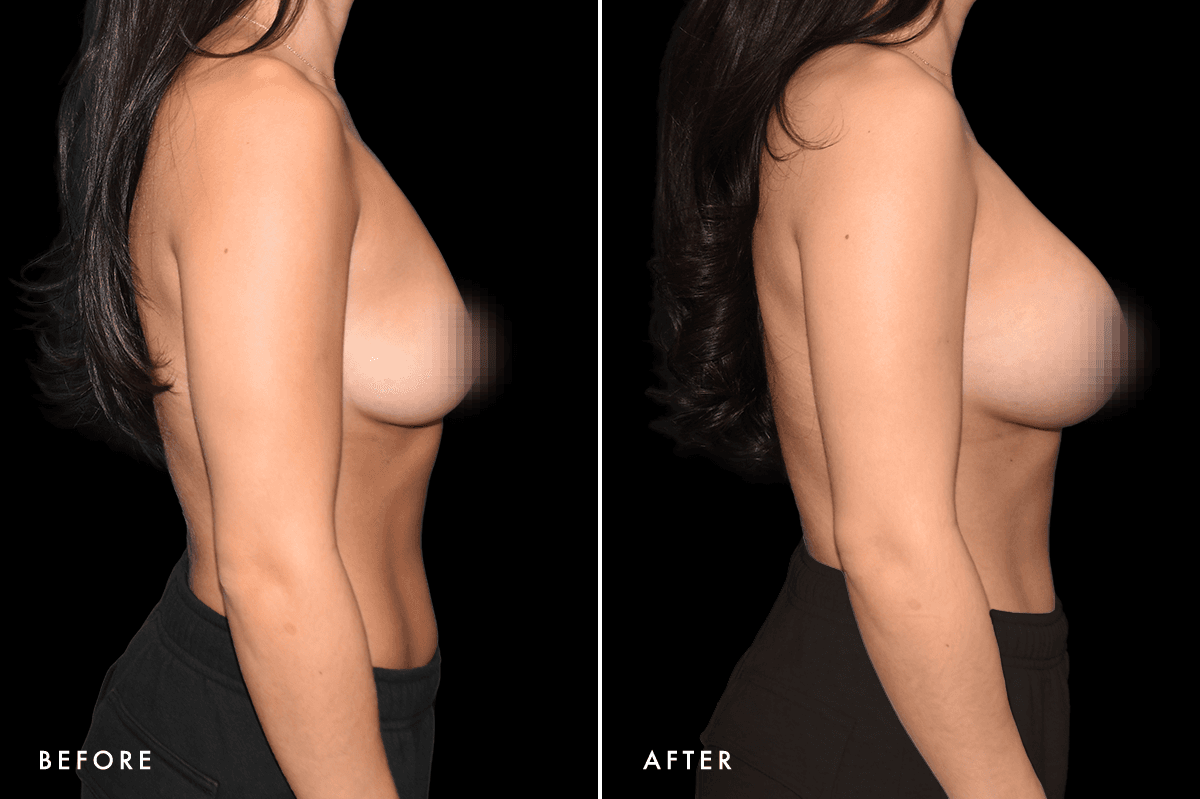
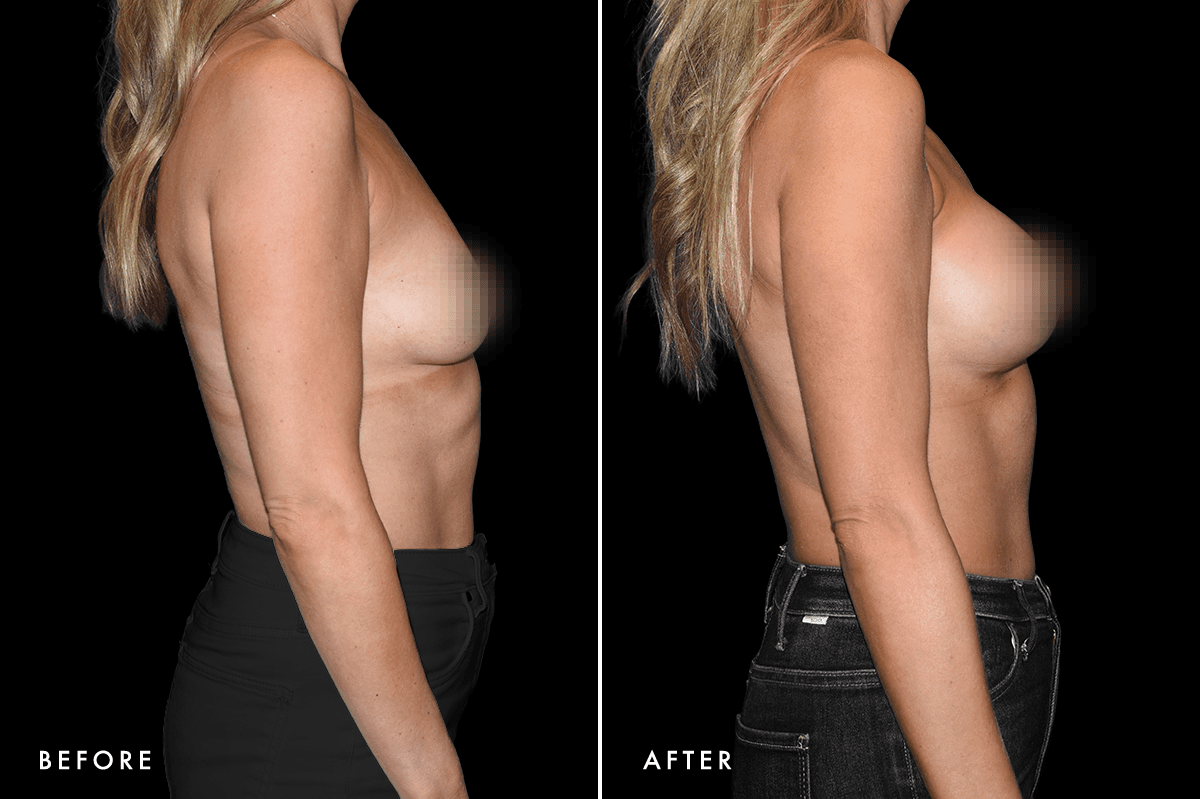
DM Breast Augmentation Gallery — Patient 1 Side

Patient 1

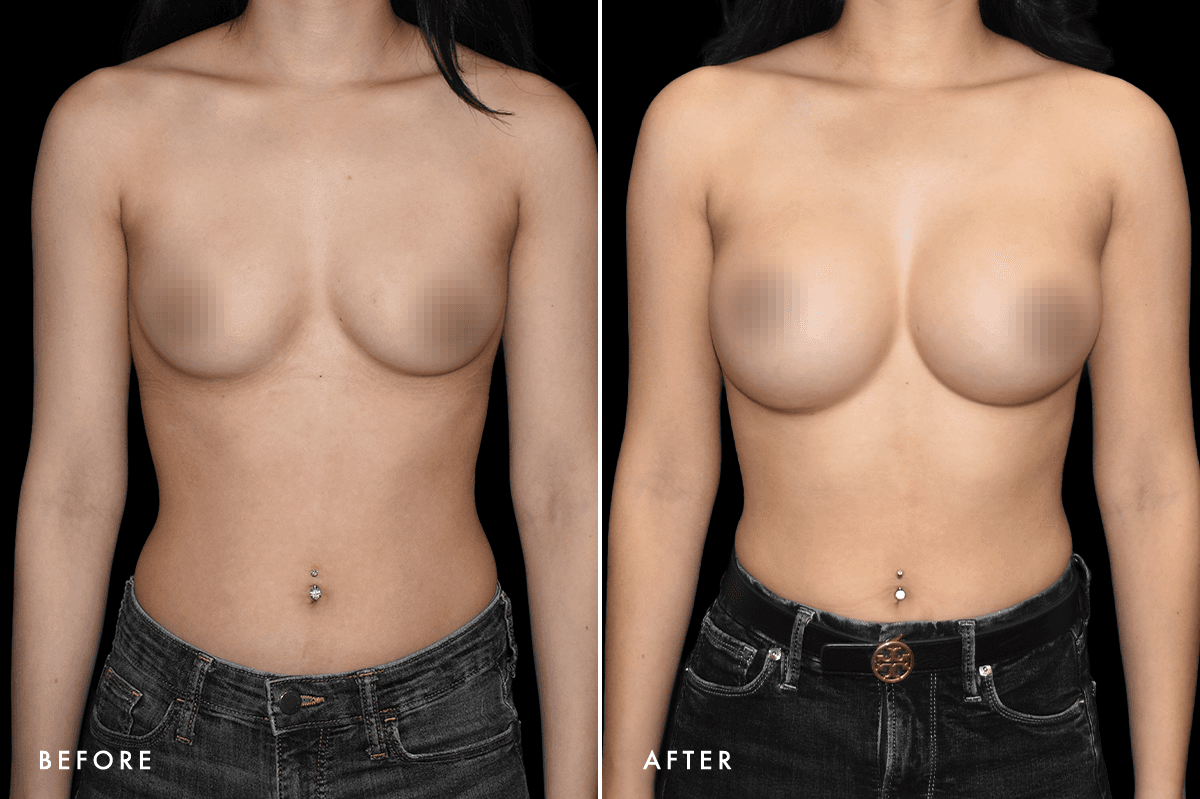
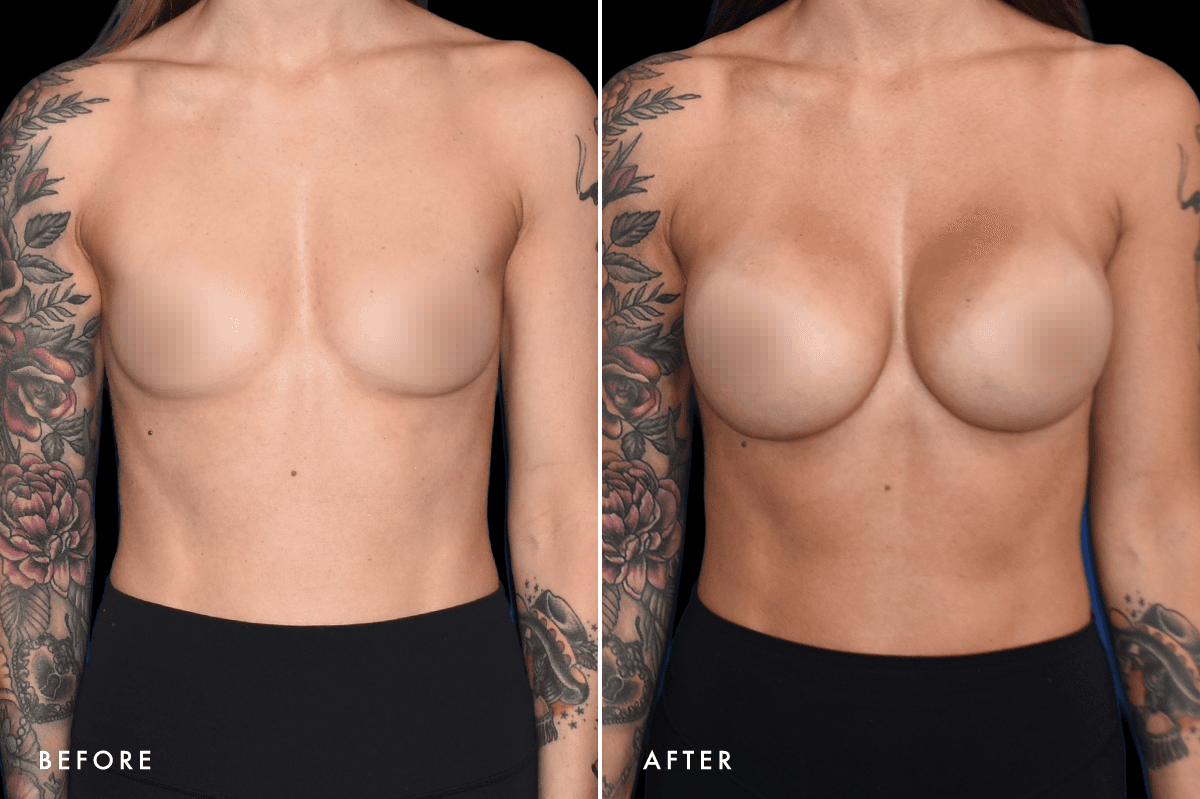
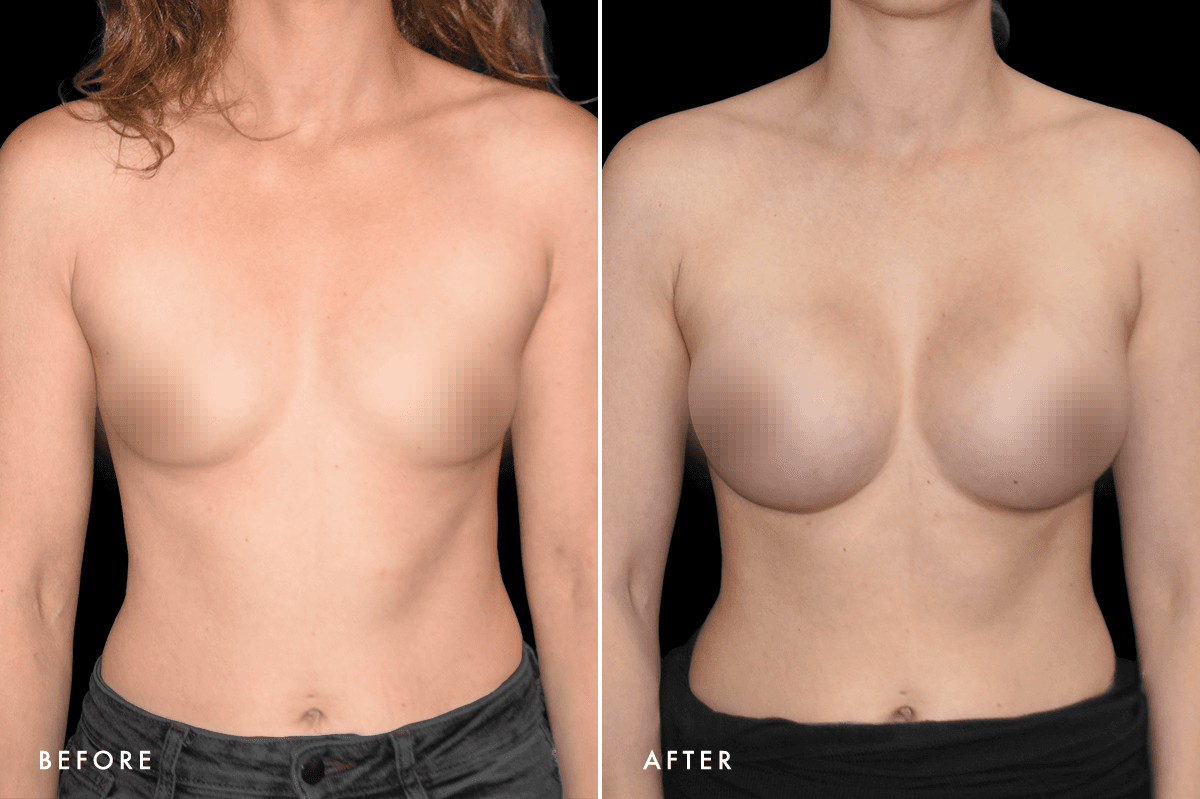
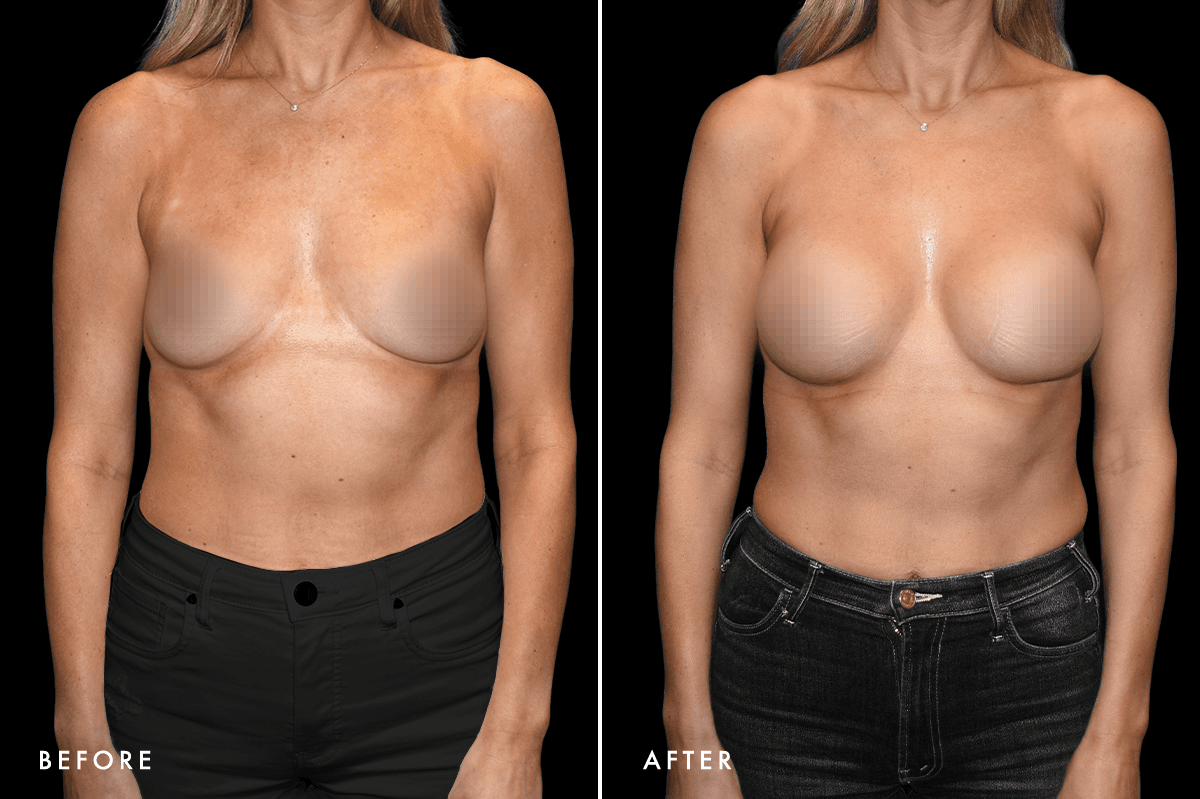
DM Breast Augmentation Gallery — Patient 2 Front

Patient 2

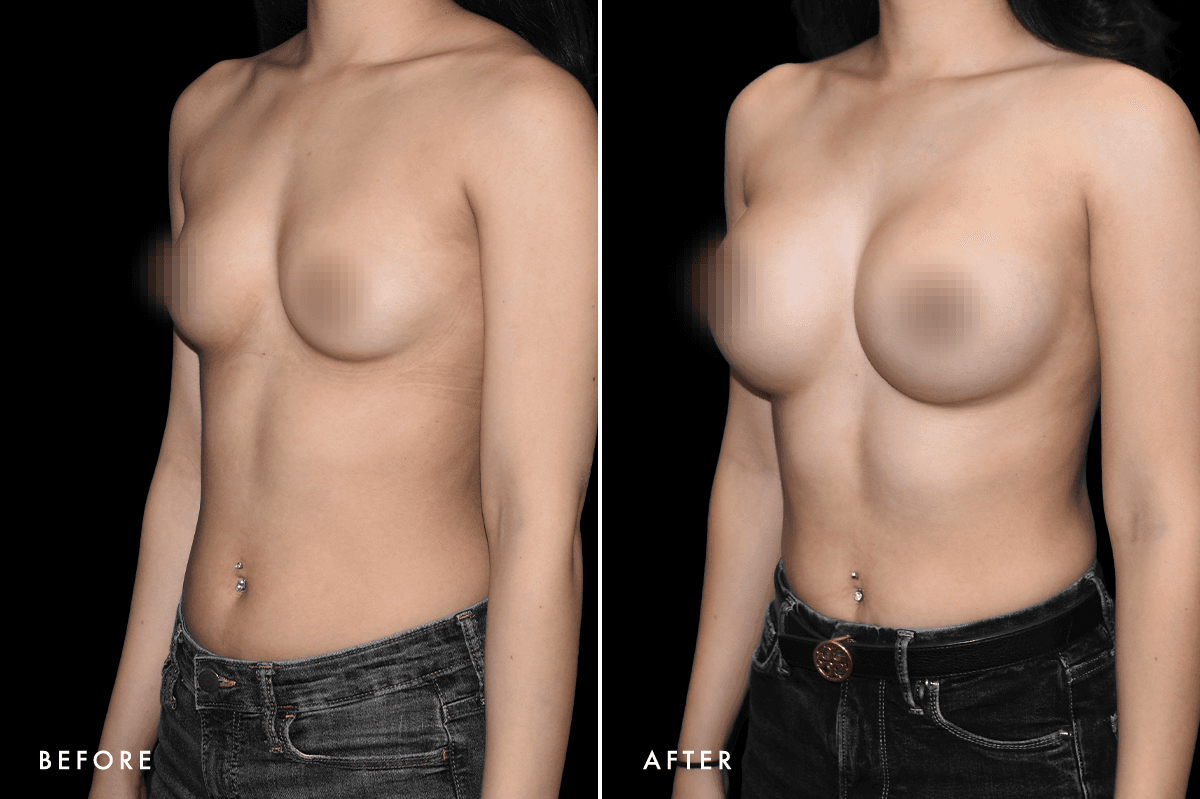
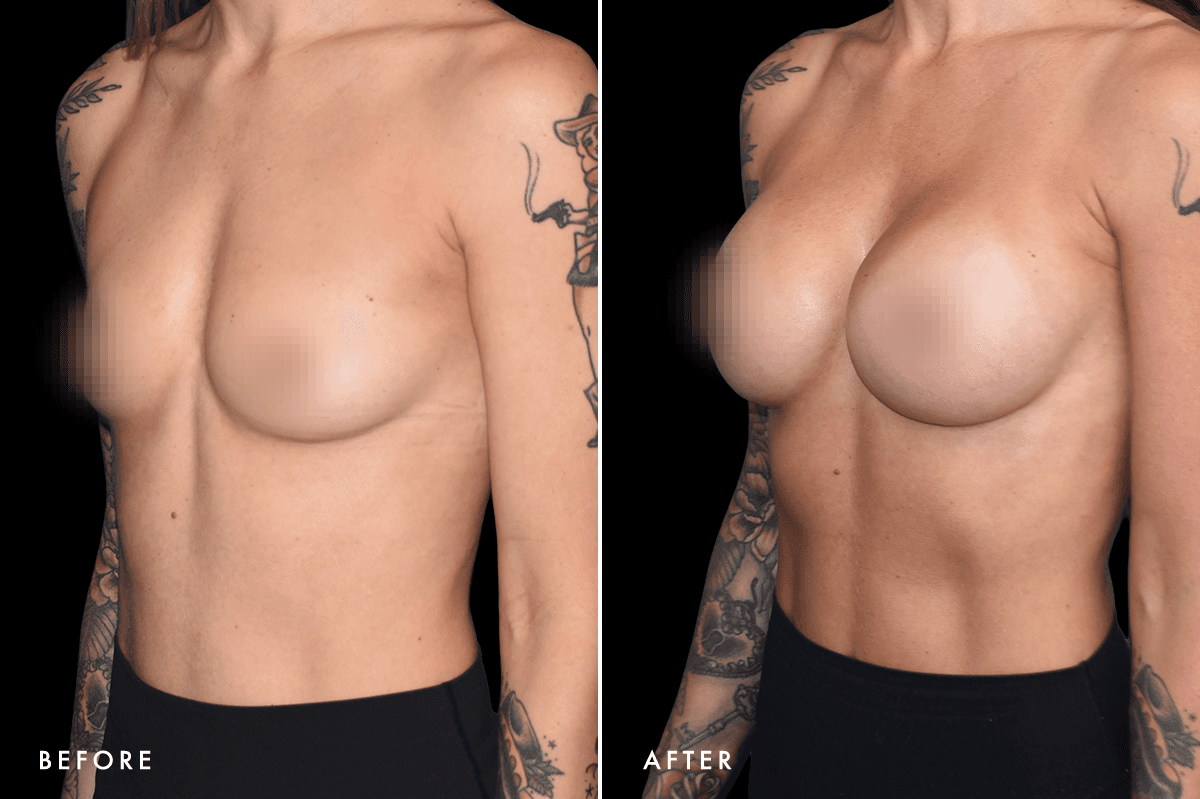
DM Breast Augmentation Gallery — Patient 2 Angle

Patient 2

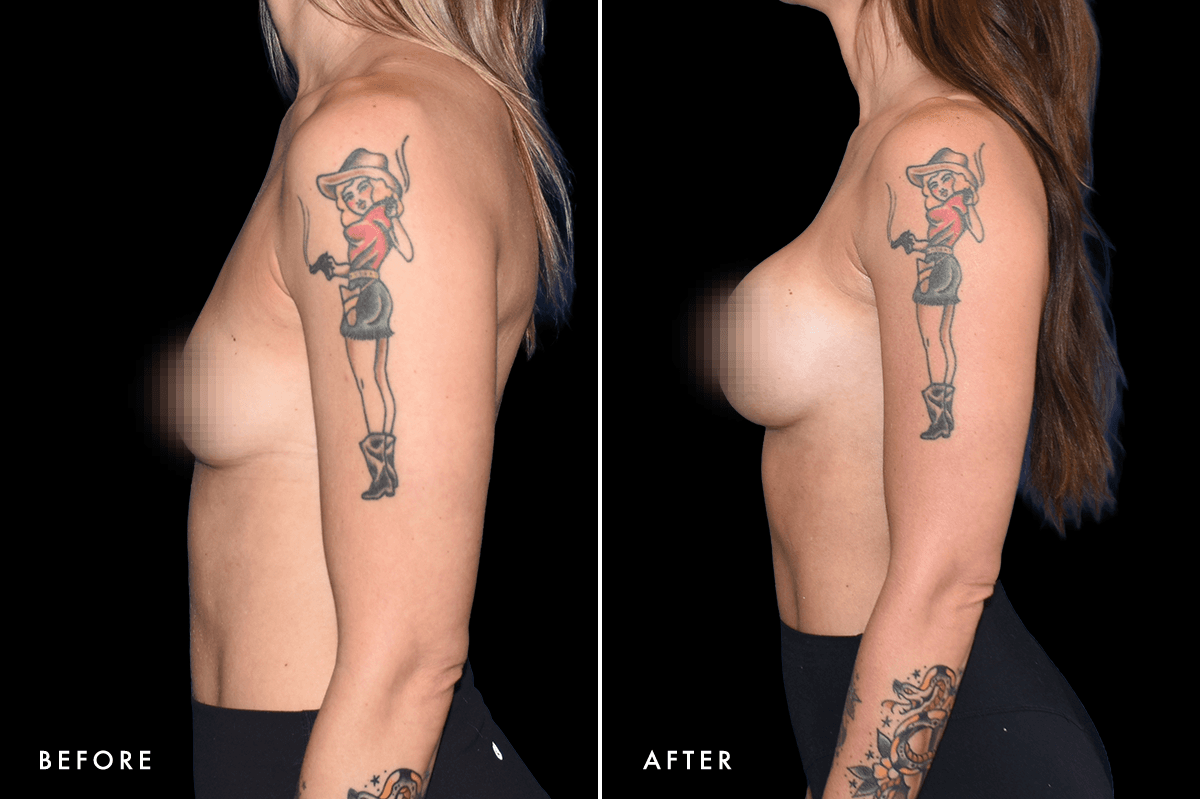
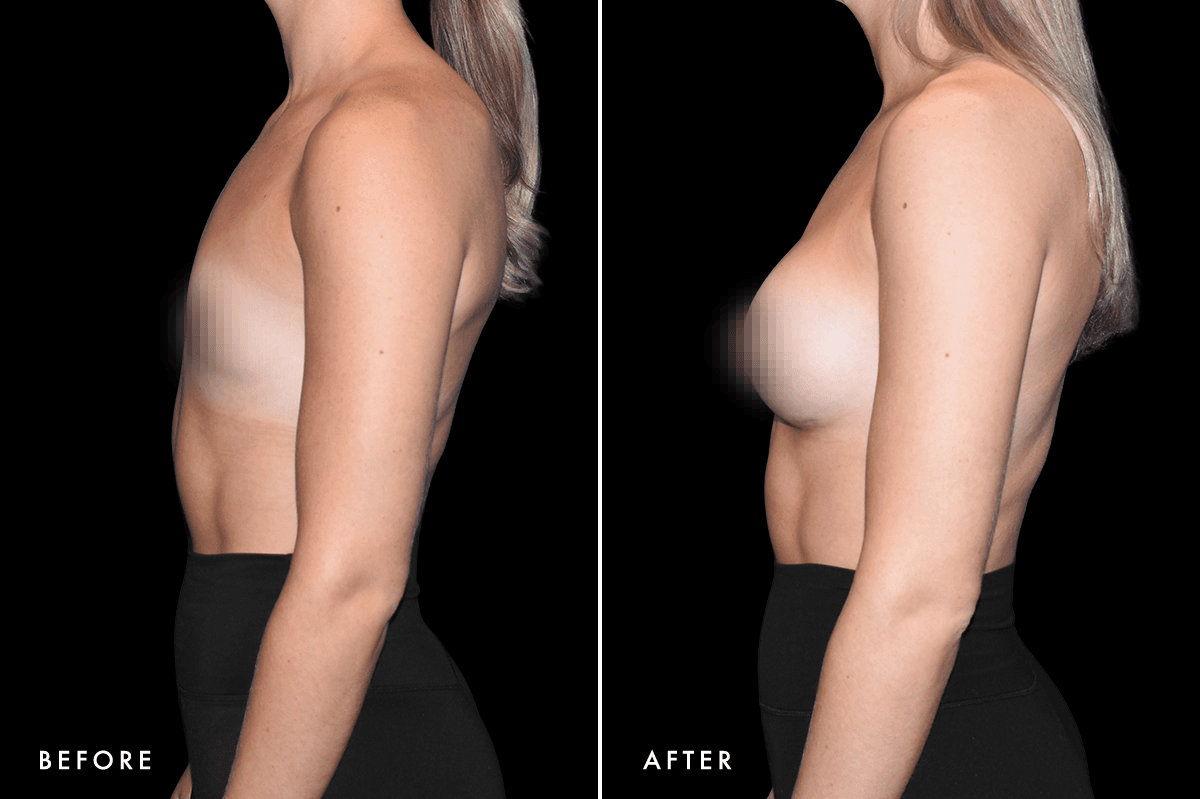
DM Breast Augmentation Gallery — Patient 2 Side

Patient 2

DM Breast Augmentation Gallery — Patient 3 Front

Patient 3

DM Breast Augmentation Gallery — Patient 3 Angle

Patient 3

DM Breast Augmentation Gallery — Patient 3 Side

Patient 3

DM Breast Augmentation Gallery — Patient 4 Front

Patient 4

DM Breast Augmentation Gallery — Patient 4 Angle

Patient 4

DM Breast Augmentation Gallery — Patient 4 Side

Patient 4

DM Breast Augmentation Gallery — Patient 5 Front

Patient 5

DM Breast Augmentation Gallery — Patient 5 Angle

Patient 5

DM Breast Augmentation Gallery — Patient 5 Side

Patient 5

DM Breast Augmentation Gallery — Patient 6 Front

Patient 6

DM Breast Augmentation Gallery — Patient 6 Angle

Patient 6

DM Breast Augmentation Gallery — Patient 6 Side

Patient 6

DM Breast Augmentation Gallery — Patient 7 Front

Patient 7

DM Breast Augmentation Gallery — Patient 7 Angle

Patient 7

DM Breast Augmentation Gallery — Patient 7 Side

Patient 7

DM Breast Augmentation Gallery — Patient 8 Front

Patient 8

DM Breast Augmentation Gallery — Patient 8 Angle

Patient 8

DM Breast Augmentation Gallery — Patient 8 Side

Patient 8

DM Breast Augmentation Gallery — Patient 9 Front

Patient 9

DM Breast Augmentation Gallery — Patient 9 Angle

Patient 9

DM Breast Augmentation Gallery — Patient 9 Side

Patient 9

DM Breast Augmentation Gallery — Patient 10 Front

Patient 10

DM Breast Augmentation Gallery — Patient 10 Angle

Patient 10

DM Breast Augmentation Gallery — Patient 10 Side

Patient 10

Ballerina Breast Augmentation

DM Ballerina Breast Augmentation B&A — Patient 1 Front

Patient 1

DM Ballerina Breast Augmentation B&A — Patient 1 Angle

Patient 1

DM Ballerina Breast Augmentation B&A — Patient 1 Side

Patient 1

DM Ballerina Breast Augmentation B&A — Patient 2 Front

Patient 2

DM Ballerina Breast Augmentation B&A — Patient 2 Angle

Patient 2

DM Ballerina Breast Augmentation B&A — Patient 2 Side

Patient 2

DM Ballerina Breast Augmentation B&A — Patient 3 Front

Patient 3

DM Ballerina Breast Augmentation B&A — Patient 3 Angle

Patient 3

DM Ballerina Breast Augmentation B&A — Patient 3 Side

Patient 3

Breast Lift

pinnacleskin.com /treatments/breast-lift Carousel 3 Image 1
pinnacleskin.com /treatments/breast-lift Carousel 3 Image 2
pinnacleskin.com /treatments/breast-lift Carousel 3 Image 3
pinnacleskin.com /treatments/breast-lift Carousel 3 Image 4
pinnacleskin.com /treatments/breast-lift Carousel 3 Image 5
pinnacleskin.com /treatments/breast-lift Carousel 3 Image 6

Breast Reduction

2 A

Patient 1

2 B

Patient 1

2 C

Patient 1

3 A

Patient 2

3 B

Patient 2

3 C

Patient 2

4 A

Patient 3

4 C

Patient 3

Capsular Contracture Correction

DM Capsular Contracture Correction B&A — Patient 1 Front

Patient 1

DM Capsular Contracture Correction B&A — Patient 1 Angle

Patient 1

DM Capsular Contracture Correction B&A — Patient 1 Side

Patient 1

DM Capsular Contracture Correction B&A — Patient 2 Front

Patient 2

DM Capsular Contracture Correction B&A — Patient 2 Angle

Patient 2

DM Capsular Contracture Correction B&A — Patient 2 Side

Patient 2

Tuberous Breast Correction

DM Tuberous Breast Correction B&A — Patient 1 Front

Patient 1

DM Tuberous Breast Correction B&A — Patient 1 Angle

Patient 1

DM Tuberous Breast Correction B&A — Patient 1 Side

Patient 1

DM Tuberous Breast Correction B&A — Patient 2 Front

Patient 2

DM Tuberous Breast Correction B&A — Patient 2 Angle

Patient 2

DM Tuberous Breast Correction B&A — Patient 2 Side

Patient 2